Showing posts with label Betsy Best-Spadaro. Show all posts

Thursday, April 03, 2014

Moku Hanga Printing Class


I recently took a two day class at the Schack Art Center in moku hanga, Japanese woodblock printing using water-based pigments rather than inks.  Betsy Best-Spadaro was the instructor.  I've taken classes from Betsy before and I always have a great time.  She's an excellent teacher, organized and logical in her instruction, and she is also very encouraging.  Betsy studied moku hanga in Japan and while she claims she in not an expert, to my eyes, she most certainly is.
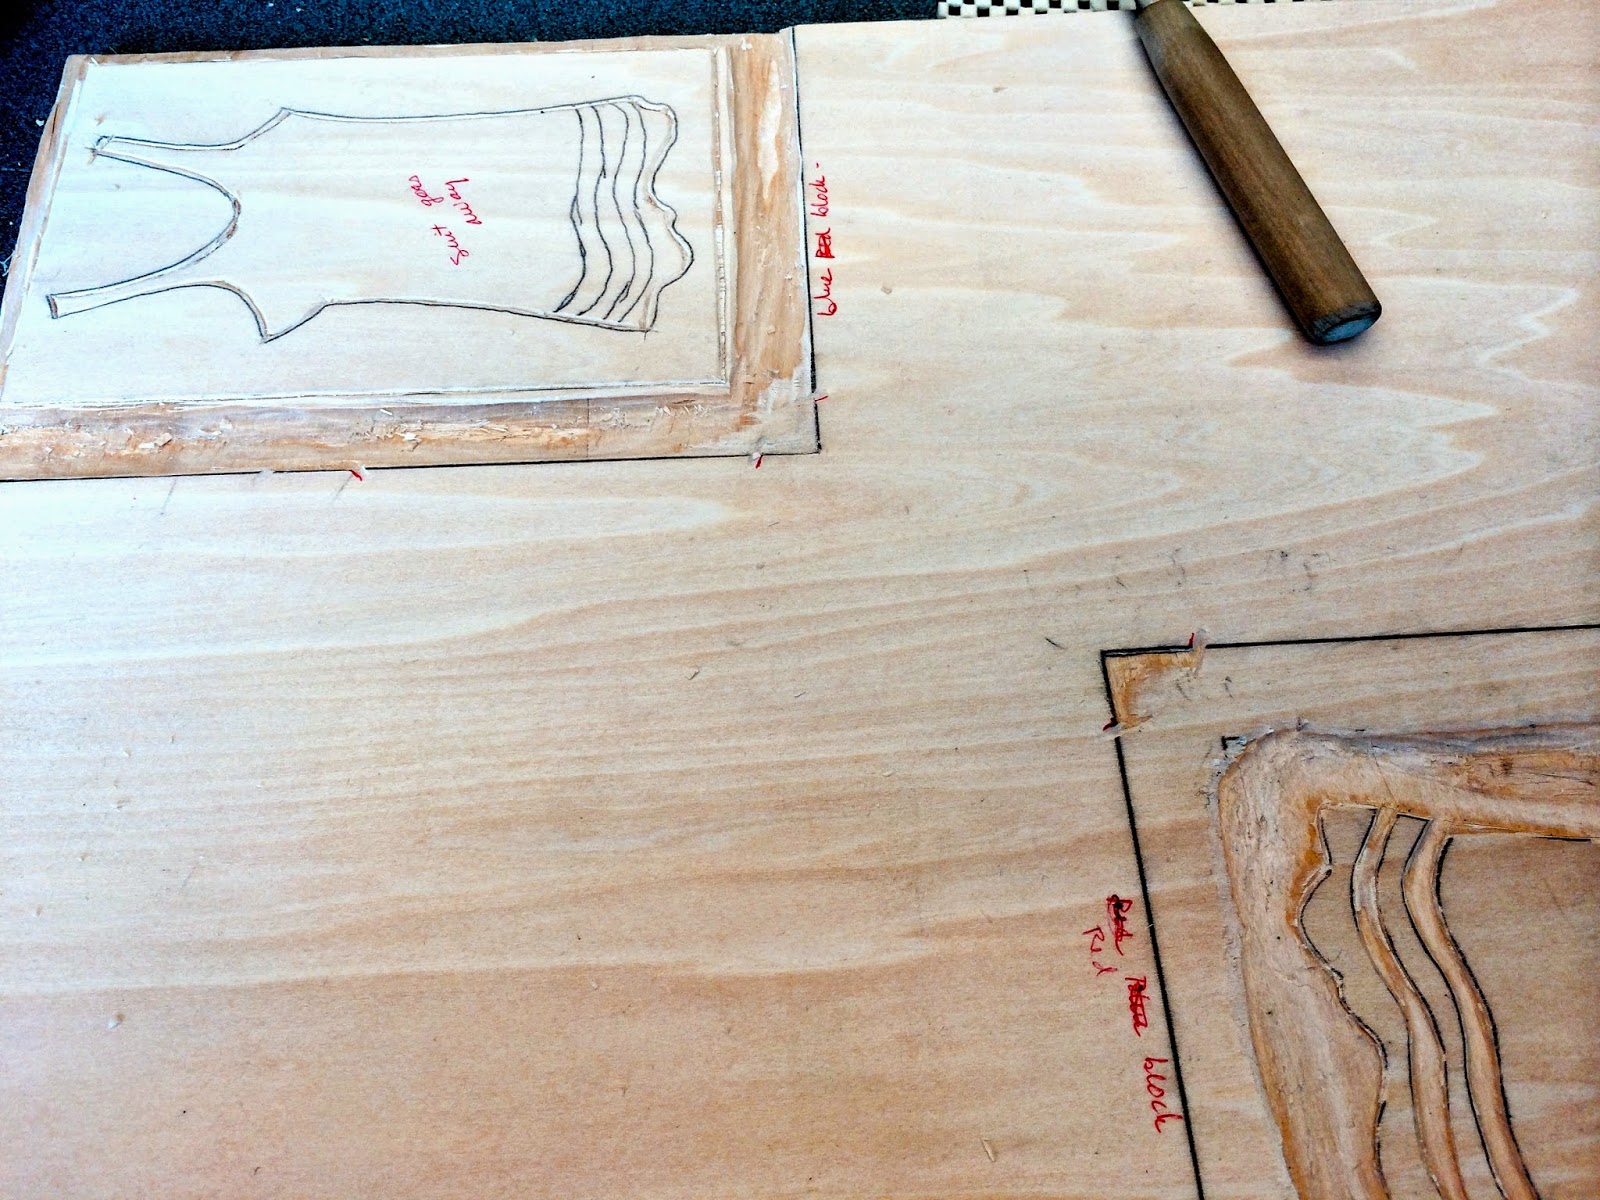

Each color in the print, except for the white of the paper, requires its own woodblock.  Each color is printed individually.

I did a simple design of an old-fashioned bathing costume which required only two blocks as I only needed to print the suit itself and the background.  In the photo above you can see the block I used to print the red of the suit.  The carved out stripes at the bottom used the white of the printing paper to add another 'color.'


This block, for the background, shows how the water-based pigment has been dabbed on.  If you look closely you'll see small white blobs.  That's the nori paste that is used to mix with the pigment.  The nori helps the pigment to stick and actually bind with the fiber in the paper.  You scrub the two (the pigment and the nori) together with a brush to create the printing medium.


Here is my first test print. I was pleased with how the print turned out, although there are areas on the block that need more carving to make for a cleaner print.


The nori is in the small plastic container at the top of the photo above and the round object in the foreground is the baren used to rub, or print, the design.  The brown paper is placed over the print paper (that has been placed on the woodblock using the registration (kento).  This sort of baren is a Japanese style and is made of bamboo.  It works really well for printing the blocks, with firm but not excessive pressure.  For those of us without a big printing press, this is a wonderfully useful tool.


Here are the finished (most of them are finished) prints from all the printers in the class.  I enjoyed the group as they were all very focused and asked great questions of Betsy.  I always learn so much from questions others ask that I don't think of asking myself.

I loved this class and have plans to do more bathing costume prints so I'll have a series.  Lots more woodblock carving in my future!

Monday, February 24, 2014

Lino Block Printing Class


I took a wonderfully fun and surprisingly productive lino print class over the weekend at the Schack Art Center in Everett.  I have taken several printing classes there since the first of the year and I've learned a lot.

This plate is the original plate I carved and the one I did all the black ink only prints with.

The teacher for this two day class was Betsy Best-Spadaro.  I have taken one other class from Betsy.  You can find my blog post on that class here and here.  I always learn so much and have a great, fun time in her classes.

This is the plate that I carved away everything except where I wanted to print red.  

This is the design I came up with.  As my friend pointed out, it came from an old sweater I wear all the time, right down to the checker board detail.  And I hadn't noticed.....oh, dear.

elephant only plate, printed in gray

Of course, once I got into the design it became apparent that I was going to have to carve three blocks to get the print I wanted.  (In color, that is.)  Betsy was gentle when she confirmed that, yes, I had to cut away my elephant.  It hurt me but I did it.

Here is the red ink only plate after carving away every thing that was not to be reel
 I printed a few times using only black ink, before I reduced (cut away) the plate.  I do like it in just black and white.

Black prints drying on the drying rack.

A print all in black on the drying rack
 Here is the print in black and white.


And here it is printed in gray, red and black.

All the prints drying on my dining room table.
 I absolutely LOVED this class.  I'm taking another two day class from Betsy next month.  Stay tuned....

Monday, May 13, 2013

Wood Block Printing Class---Day 2


my block with the second color of ink applied

This is a continuation of my reduction wood block printing class that I took at the Schack Art Center in Everett this past weekend.  If you missed the first post you can find it here.

Betsy Best-Spadano was the instructor.  She was wonderful!


Here's my block just about to be run through the engraving press.


This is what the block looked like when it was removed from the printing press....


...and here is what the print looked like as I peeled it off the block.  Two out of four colors were now printed.

\

My block began to look used, as each successive color was printed.  I love how it looks as it gets inked and then reduced some more.


And here are the prints with all four colors printed.  I am very happy with these.  I wish that it would have been possible to have done a larger run, but with 8 other people needing to ink and print their blocks, a small run was all that was possible.  I can't wait to do more printing!  I had a wonderful weekend.  Just what I wanted for Mother's Day!


Our instructor, Betsy Best-Spadano, did her own blog post about the class.  If you are interested, you can read it here.

Saturday, May 11, 2013

Wood Block Printing Class---Day 1

Betsy Best-Spadaro
 I am taking a wood block printing class at the Schack Art Center in Everett, Washington.  The instructor is Betsy Best-Spadaro.  I am having a great time!


This class reduction block printing.  Basically, you print in several colors and once you have printed your run (the number of prints you are attempting) with one color, you then carve away that particular color from the block.  You start with the lightest color, in my case, yellow, and once I have printed each piece of paper in my edition with the yellow, I go back and carve away the part of the block that I want to stay yellow.  I am reducing the block.  Betsy told us today that reduction block printing is sometimes called "suicide blocks."  I can see why!

Betsy showing us how she will. carve this wonderful face she is working on.
 In the above photo, Betsy was showing us how to get a sharp edge by using the knife blade and making angled cuts, two for each line, in the shape of a V.


This shows the beginning of my design for my wood block.  I used a photo I took in Africa of an acacia (thorn tree).


Using colored pencils to color a tissue paper copy of my design gave me an idea of how the print would look when done with ink.  It was pretty close to what I "see" in my mind's eye, so I am going with a four color print...yellow, orange, lavender/violet and something dark, maybe a dark brown or a purple-y black.  I'm not yet sure what the darkest color will end up.


Here I am transferring my design onto my block with tissue paper and carbon paper.  I have transferred the design in reverse so when it is printed, it will appear the way I drew it.


Now the design is transferred to the wood block.  We are using shina plywood wood blocks for this project.  Shina is easy to carve.


I have inked the block, using a mask that covered the bottom part of the block (no need to waste the ink and I do not want yellow under a purple layer---a good way to get "mud").  The mask is cut out of scrap paper.  You ink the block right over the mask, then remove the mask before making the print.  We are using an engraving press.

The ink we are using is very transparent.


Here you can see my prints drying on the drying rack.


Once I had all my yellow printing finished, I carved away the parts of the block that I want to remain yellow on the prints.  The next color will be orange for the sky.  You can see the mask for the block that I have prepared before inking the block with the orange ink.


Here's a close-up of the clouds in the sky caved away.  Now that part of each of the prints will remain yellow.

Tomorrow I will post more photos to show the progression of my prints.  I am excited to continue.  This is really fun!